In short
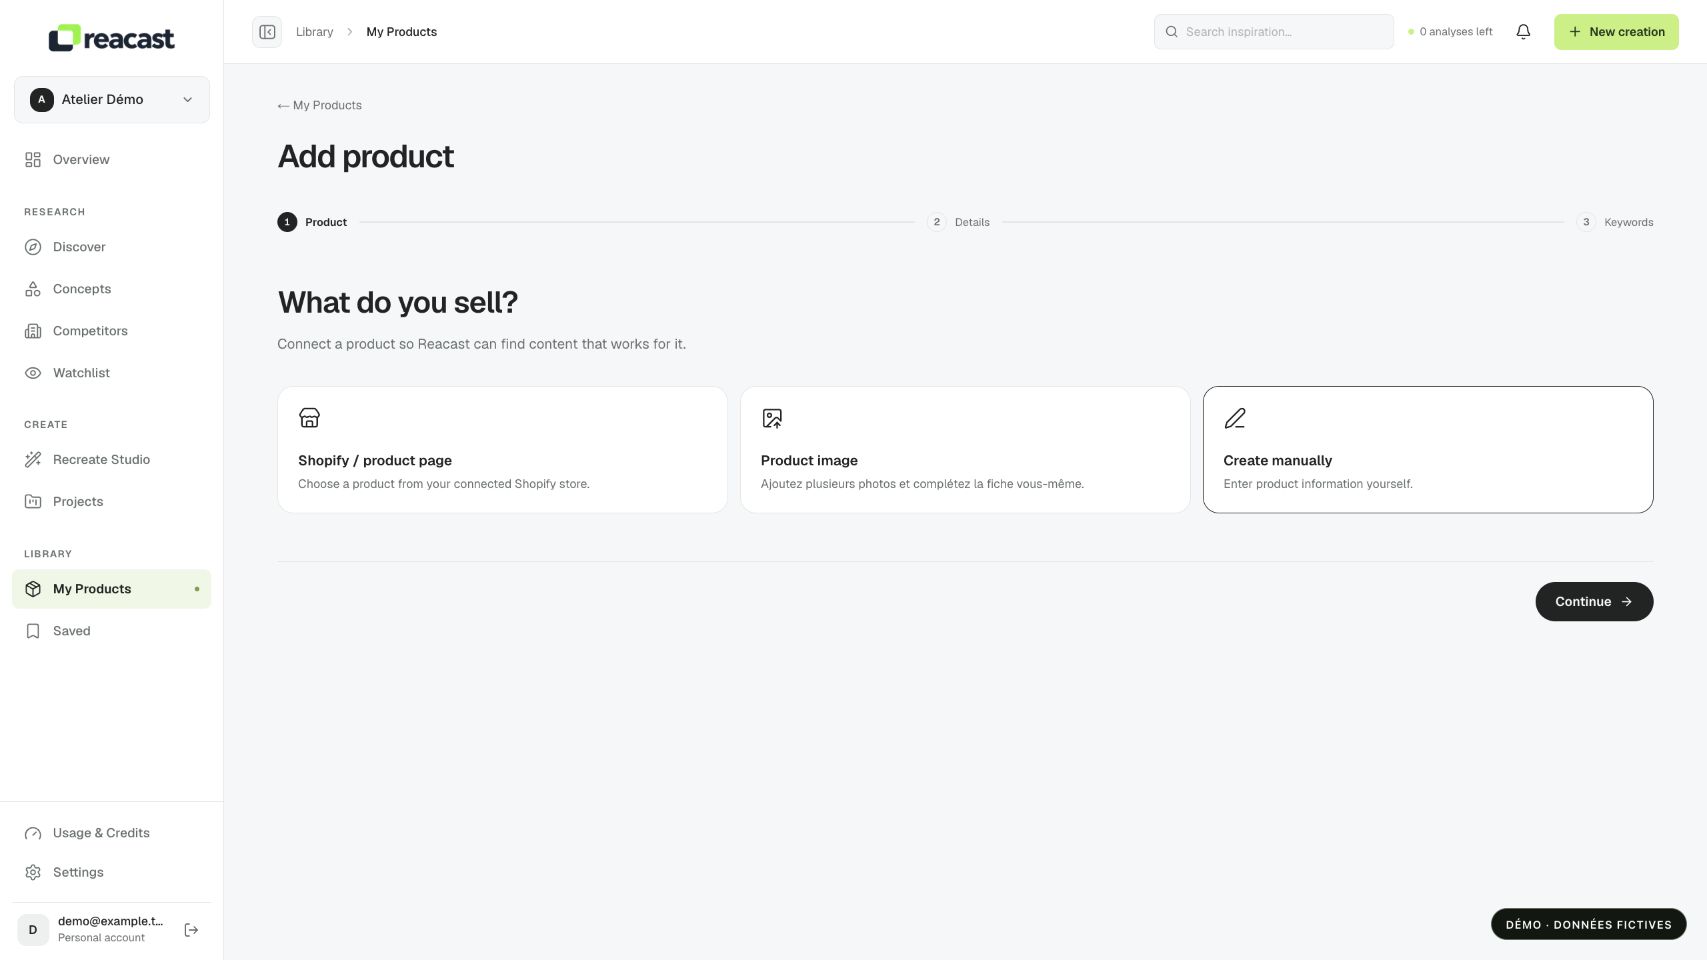
Reacast offers several entry points depending on your situation: read a public product page during onboarding, select a Shopify product from an already connected store, or enter a record with your photos. You still need to review the details.
A public URL during initial setup
At the product step of onboarding, you can request a public product page to be read. Paste the record’s URL, start reading it, then review the suggested fields. This prefill does not connect your store or synchronize its catalog.
The page must be accessible without signing in. If it is inaccessible or contains no usable details, choose manual entry to continue. Do not replace missing information with a guess.
A product from your Shopify store
- If your store is already connected in Settings → Connections, open My Products → Add product.
- Click Shopify / product page to open the connected catalog selector. Choose the product to add.
- Review the details and suggested keywords, make any corrections, then finish saving. Shopify photos are imported in the background, so they may appear later.
If the store or catalog is unavailable, check the connection status in Settings. The selector adds one chosen record at a time; it is not a CSV or bulk import.
Your photos or manual entry
Choose Product image if you already have photos: select your files, then enter the name, category and description. A photo does not trigger automatic product recognition.
Choose Create manually if you prefer to start with text. You can also add photos at the details step. This method works for a product that does not have a public page yet.
In Add product, the Product URL field of a manual record only stores a reference. Pasting a URL there does not read the page.
Which method should you choose?
During onboarding, use a public page to save time on prefilling. Once Shopify is connected, select the record from the catalog. In other cases, manual entry with or without photos lets you create a product without depending on a store.